Outline
- Tutorial preparation
- Introduction on real earthquake scenario
- Scenario steps
- Pre-event and post-event DSM productions with CARS
- Pre-event and post-event DTM productions with Bulldozer
- DHM differences with Demcompare
Slides are available here: https://cars-cnes.github.io/discover-cnes-3d-tools/
Tutorials sources: https://github.com/cars-cnes/discover-cnes-3d-tools

![]()

Tutorial preparation
Local Virtualenv (Linux) : best way
Use CNES jupyter hub with personal temporary account (nothing kept after)
Other possibilities: virtualization, docker, ...
Please ask presenters if environment is compatible.
Virtualenv (Linux) Method
Prerequisites:
- python>3.8
- python3-venv or virtualenv
- gcc > 8 for vlfeat
- Internet access
- QGIS or other geotiff reader to see results
Steps:
Go in your working directory
Create a virtualenv
python -m venv venv-tutorial/
source venv-tutorial/bin/activate
Virtualenv (Linux) Method
- Install CARS and VLFEAT dependency :
VLFEAT install:
git clone https://github.com/CNES/vlfeat.git
cd vlfeat && make MEX=$MATLABROOT/bin/ && cd ..
export CFLAGS="-I$PWD/vlfeat"
export LDFLAGS="-L$PWD/vlfeat/bin/glnxa64"
export LD_LIBRARY_PATH="$PWD/vlfeat/bin/glnxa64:$LD_LIBRARY_PATH"
CARS install:
pip install --upgrade "pip<=23.0.1" "numpy>=1.17.0" cython
pip install cars
CARS Doc: https://cars.readthedocs.io/
Virtualenv (Linux) Method
- Install bulldozer
pip install bulldozer-dtm
for last version:
    git clone https://github.com/cnes/bulldozer
    cd bulldozer
    pip install .
Bulldozer Doc: https://github.com/cnes/bulldozer/
- Install demcompare tool
pip install demcompare[notebook]
Demcompare Doc: https://demcompare.readthedocs.io/
Virtualenv (Linux) Method
- Get tutorial data from https://github.com/cars-cnes/discover-cnes-3d-tools/ in data_turkey directory : download from github or git clone :
git clone https://github.com/cars-cnes/discover-cnes-3d-tools/
Virtualenv (Linux) Method
- Jupyter notebook installation
Install Jupyter packages in previous virtualenv:
source ./venv-tutorial/bin/activate # enter the virtualenv if not done.
pip install notebook rise bokeh
# add any tool you may need through pip install
Build Jupyter kernel:
python -m ipykernel install --sys-prefix --name=cars-kernel --display-name=cars-kernel
- Run Local Jupyter environnement:
jupyter notebook- Follow the proposed localhost link to the jupyter notebook web interface.
CNES Jupyter Hub Method
Prerequisites:
- Firefox (not too old)
- Internet access
Steps:
Connect a first time to https://jupyterhub.cnes.fr/ (use a personal temporary account, ask presenters)
Select default configuration in "Server Options", click "Start" and wait (!)
CNES Jupyter Hub Method
Steps:
- Run a terminal in CNES jupyter lab with following needed but no to bother details:
Update kernel to a virtualenv with cars, bulldozer and demcompare (update version if needed)
mkdir -p .local/share/jupyter/kernels
ln -s /softs/projets/cars/kits/cars-0.7.0/jupyter/kernels/cars-0.7.0/  .local/share/jupyter/kernels/
Resolve numba cache problem
echo 'export NUMBA_CACHE_DIR=$TMPDIR' >> ~/.bashrcCNES Jupyter Hub Method
Steps:
Stop the server ("Shutdown" or File-> Hub Control Panel -> "Stop my server") and wait !
Reconnect to a server ("Start my server") to refresh kernels and configuration and select again default configuration.
Copy data in your directory in a jupyter terminal
Command:
cp -R /softs/projets/cars/tutorial/discover-cnes-3d-tools/ ~/
cd ~/discover-3d-tools/
- In a terminal, you can use cnes 3d tools using already install module
Command:
module load cars/0.7.0Ready ?
Ask presenter if you have any problems.
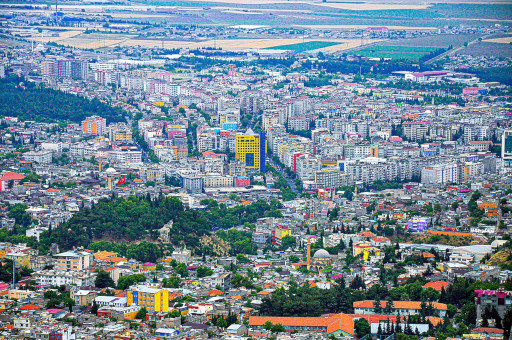
Introduction on real earthquake scenario
![]()
Introduction on real earthquake scenario
Event: 2023 Turkey/Syria Earthquake
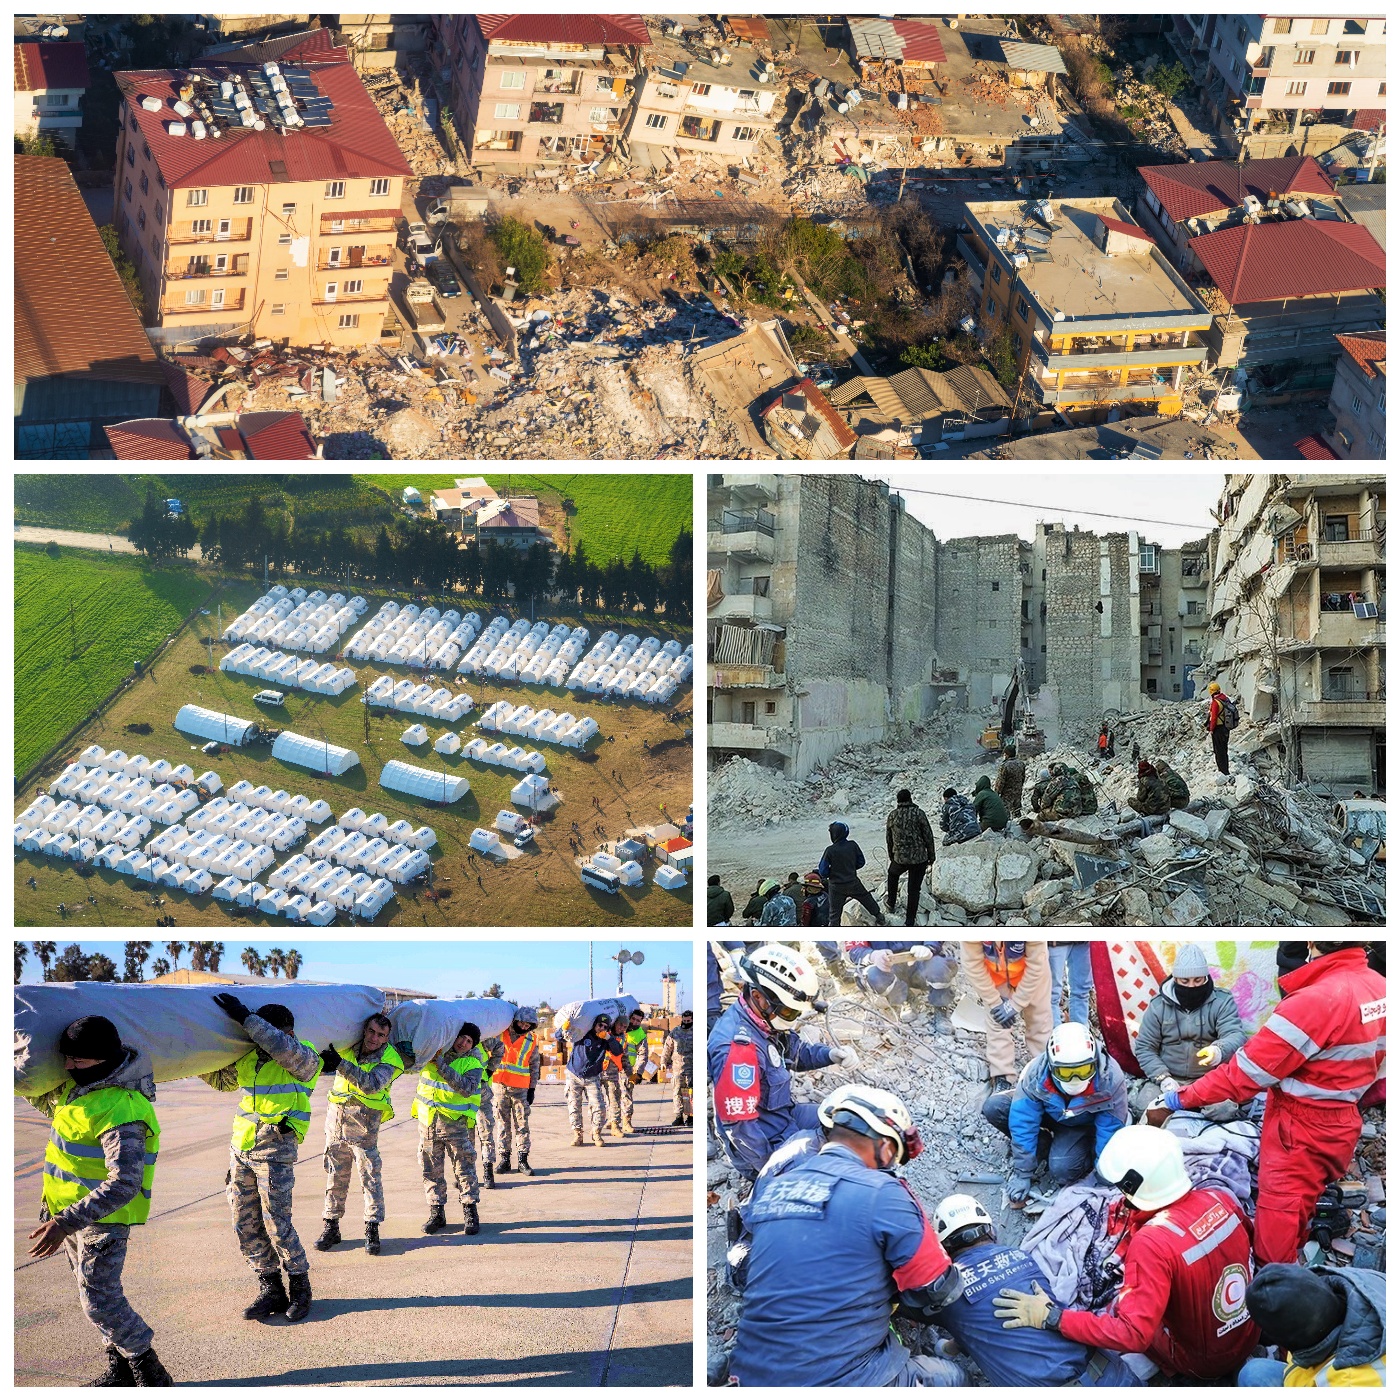
Links: https://en.wikipedia.org/wiki/2023_Turkey%E2%80%93Syria_earthquake
How can satellite help ?
How to see earthquake impacts ? By analysing and comparing satellite pre-event and post-event.
2D images not enough to see the real differences automatically, 3D can really improve by seeing elevations differences on the scenes.
This tutorial show technical steps from satellite data to difference maps of the earthquake zone.
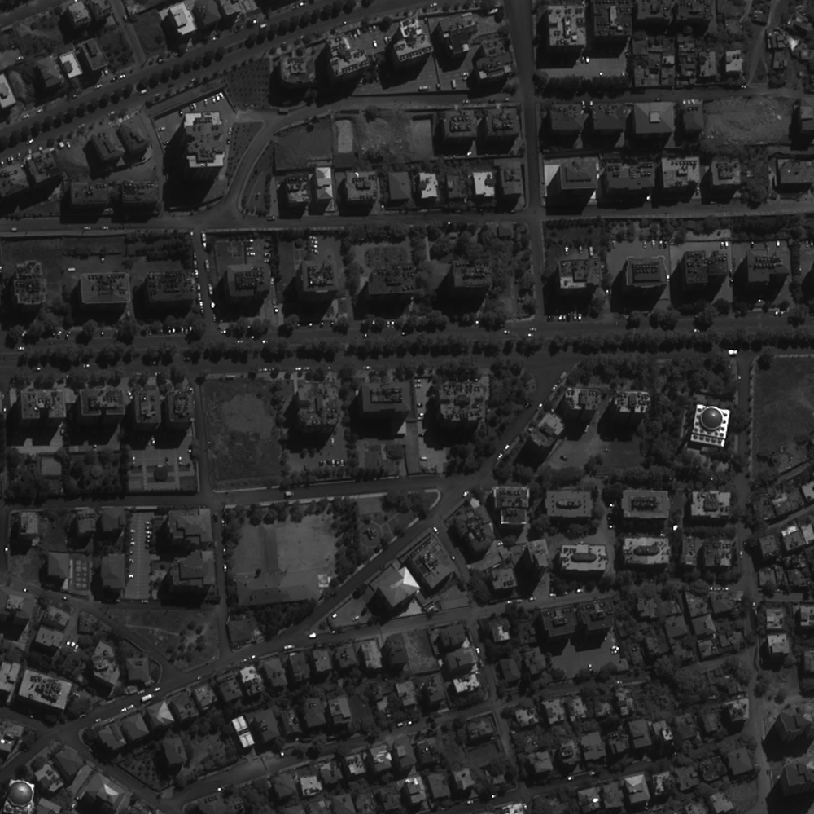
Turkey scenario scene
Scene chosen on Kahramanmaraş_Province in Turkey : download Turkey Pleaides data from https://github.com/cars-cnes/discover-cnes-3d-tools/ in data_turkey/ directory :
- Pre-event pleiades images : 2016/04/23
- Post-event pleiades images: 2023/04/15
Remarks:
- Need at least 2 images to do 3D views (stereo).
- Pleaides Panchromatic images (one band) are used for 3D for better quality
- RGB scenes are also used to better see the scenes.
Links: https://en.wikipedia.org/wiki/Kahramanmara%C5%9F_Province
Pre-event Panchro scene 1
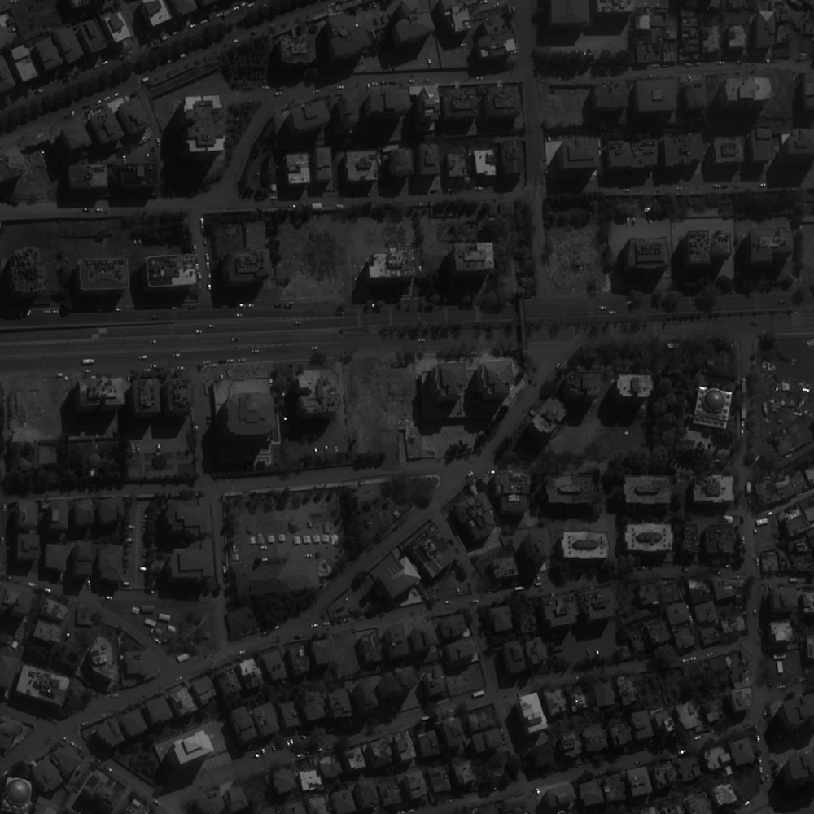
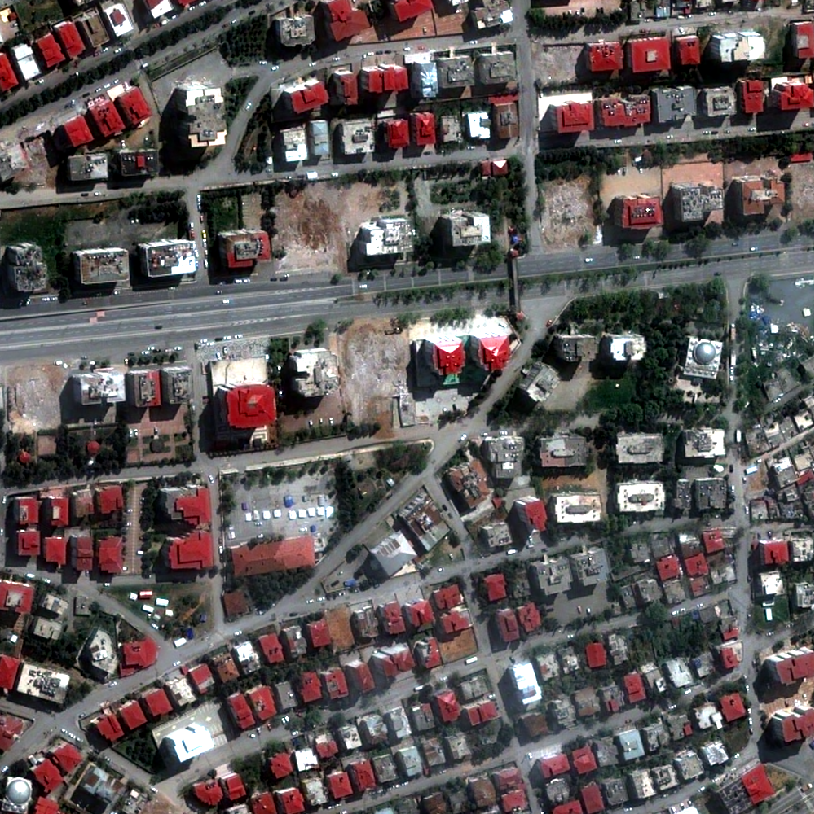
Post-event Panchro scene 1
Pre-event RGB scene 1
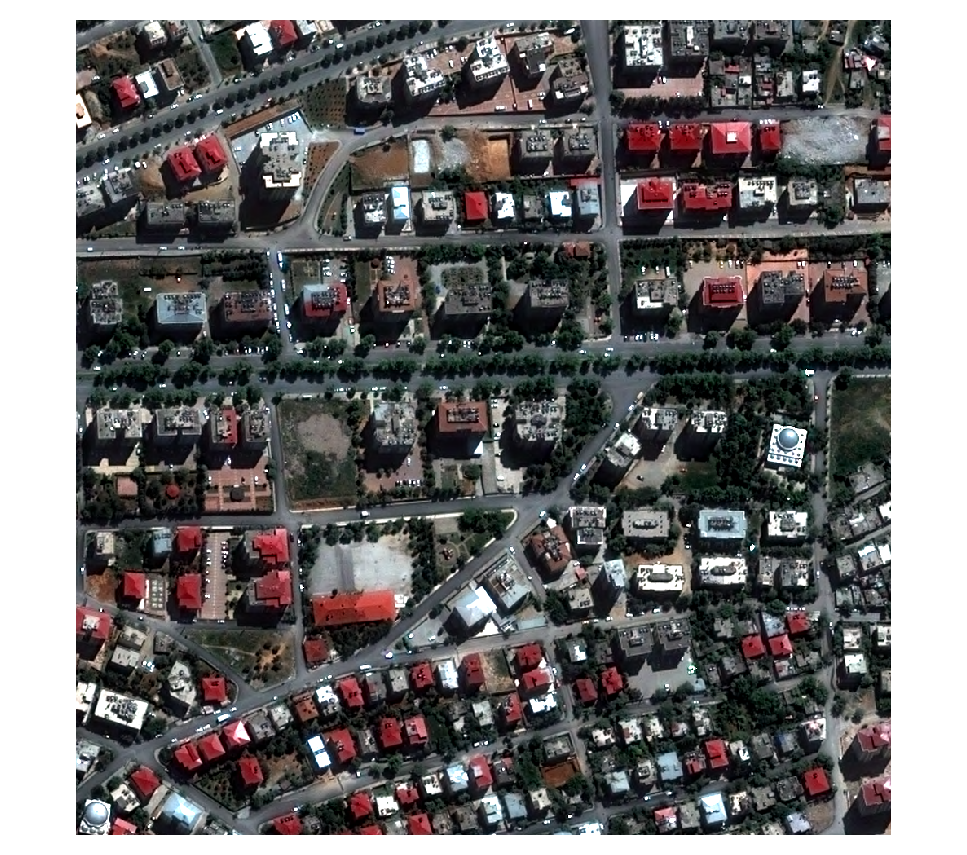
Pre-event RGB scene 2
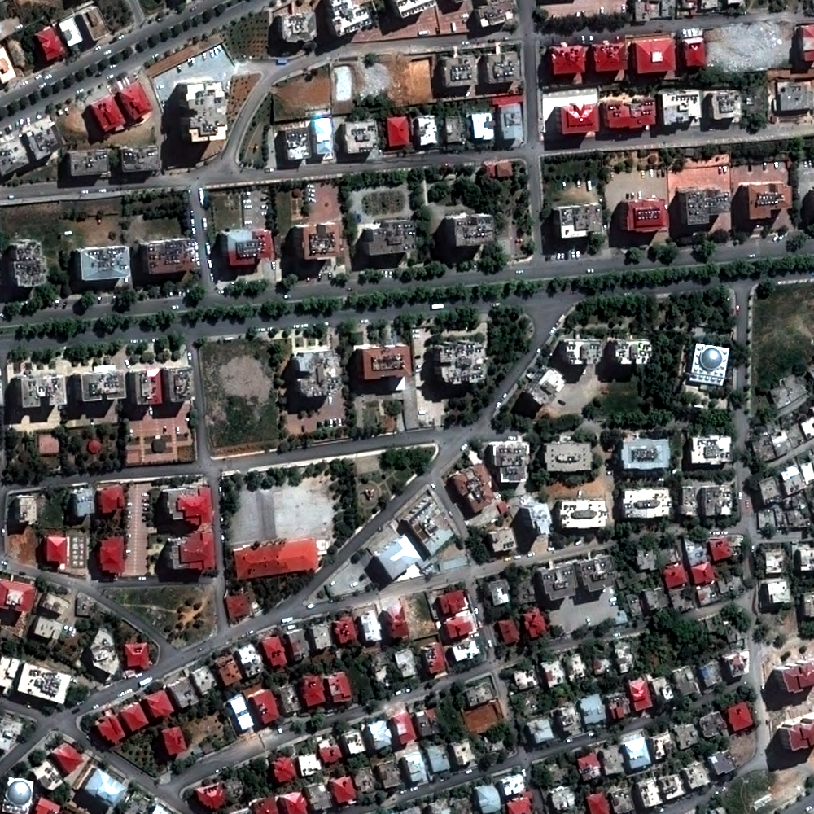
Post-event RGB scene 1

Post-event RGB scene 2
Reminders:
- DSM: Digital Surface Models, represents the earth surface with all objects.
- DTM: Digital Terrain Models, bare ground surface without any objects like plants and buildings
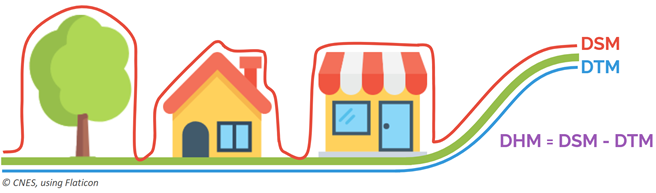
- DHM: Digital Height Model (DSM-DTM), contains only the objects above the DTM.
Scenario steps.

- From satellite pre and post event stereo data, pre and post event Digital Surface Models are created with CARS.
- From Digital Surface Models, all "above terrain" is removed with Bulldozer to make Digital Terrain Models.
- Bulldozer produces also only "above terrain" terrain Digital Height Models (DSM-DTM differences)
- From this 3D data, we compare Digital Height Models differences.
![]()
DSM productions with CARS
Tutorial DSM production with CARS : see dedicated slides
Configure CARS with Turkey Data
Run pre event production
Run post event production
CARS configuration
config_cars_pre_event.json example in data_turkey directory:
{
    "inputs": {
        "sensors" : {
            "one": {
                "image": "pre_event_img1.tif",
                "geomodel": "pre_event_img1.geom",
                "color": "pre_event_color1.tif",
                "no_data": 0
            },
            "two": {
                "image": "pre_event_img2.tif",
                "geomodel": "pre_event_img2.geom",
                "color": "pre_event_color2.tif",
                "no_data": 0
           }
        },
        "pairing": [["one", "two"]],
        "initial_elevation": "srtm_dir/N37E036.hgt"
    },
    "output": {
        "out_dir": "outputs_cars_pre_event",
        "dsm_basename": "cars_dsm_pre_event.tif",
        "clr_basename": "cars_clr_pre_event.tif"
    }
}
CARS DSM production
Steps:
# in virtualenv before !
cd data_turkey
# run pre event production
cars config_cars_pre_event.json
# run post event production from post event scene 1 and post event scene 2
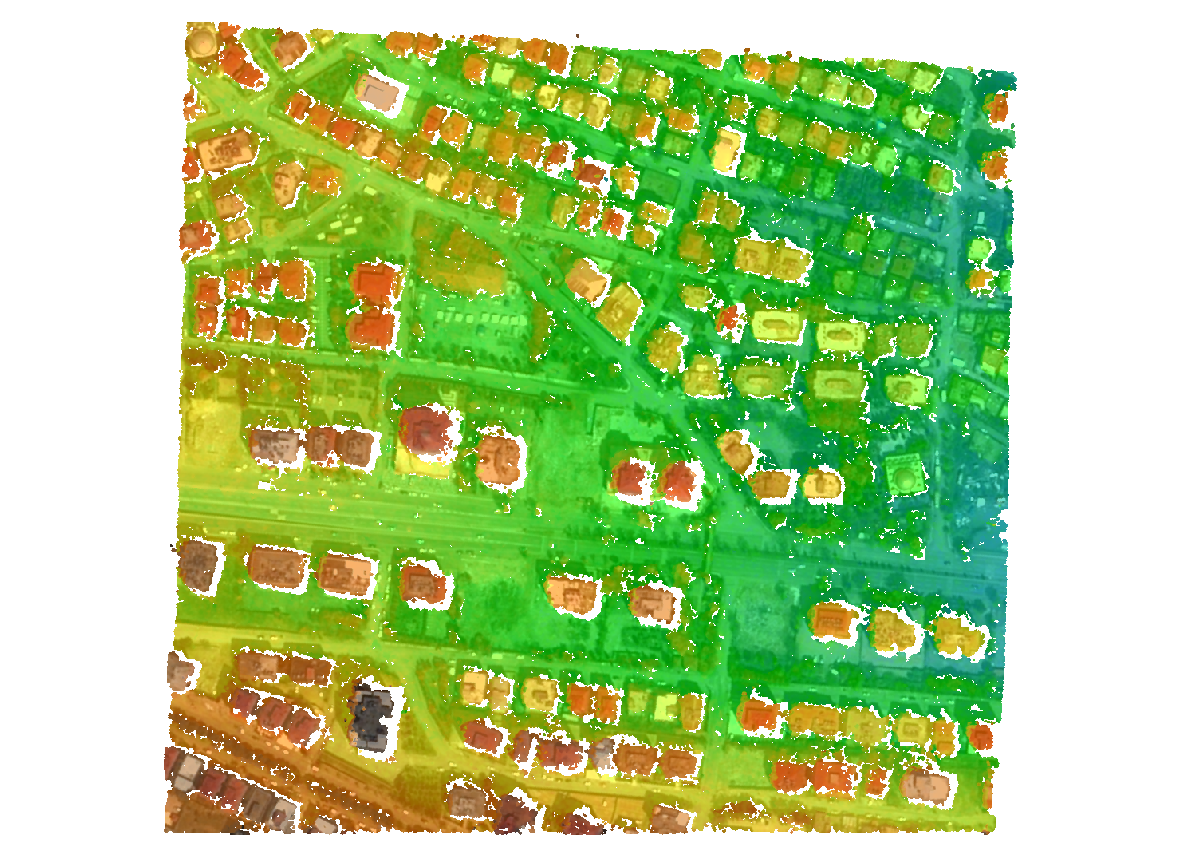
cars config_cars_post_event.jsonCARS DSM results pre event
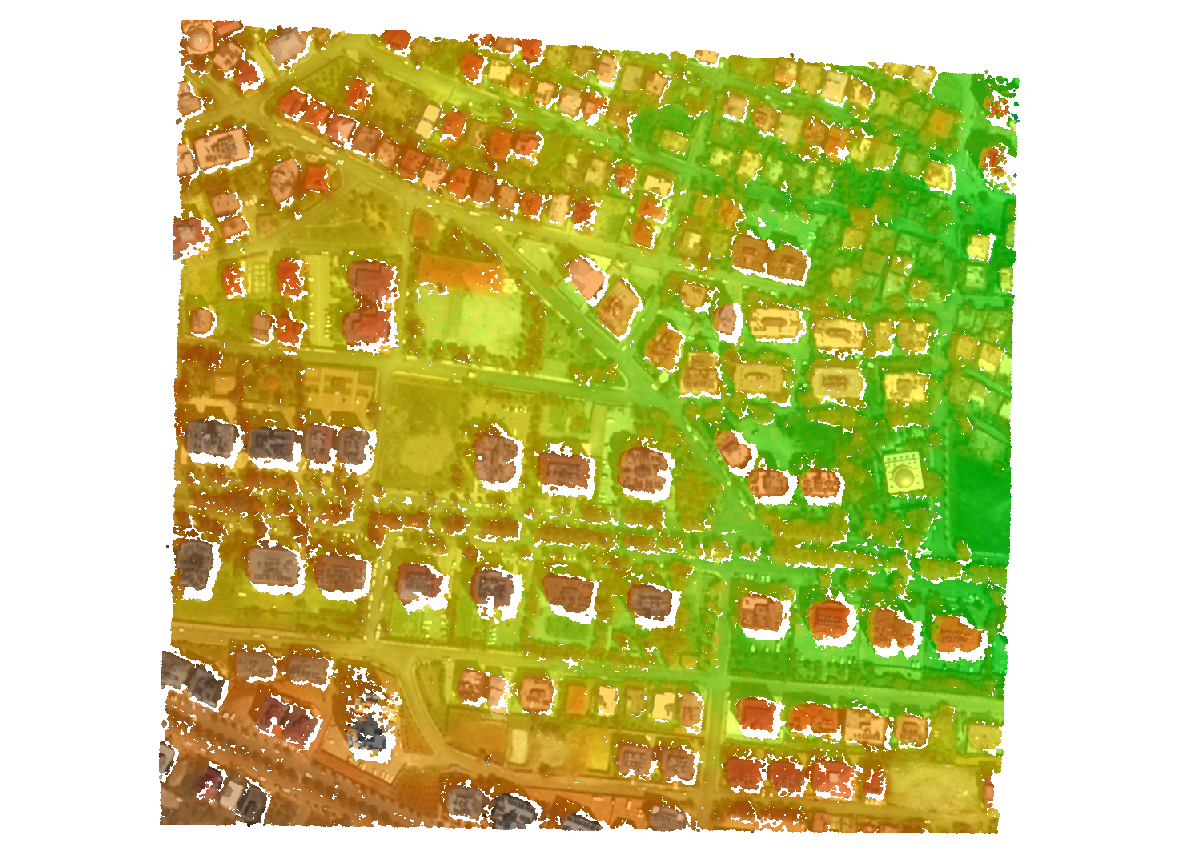
CARS DSM results post event
DTM and DHM productions with Bulldozer
Tutorial DTM and DHM production with Bulldozer : see dedicated slides
Configure Bulldozer with CARS DSM Turkey Data
Run pre event DTM and DHM production
Run post event DTM and DHM production
Bulldozer configuration
config_bulldozer_pre_event.yaml example in data_turkey directory:
#-------------------------#
#       Parameters        #
#-------------------------#
# [Required] - Input DSM path (expected format: "<folder_1>/<folder_2>/<file>.<[tif/tiff]>")
dsm_path : "outputs_cars_pre_event/cars_dsm_pre_event.tif"
# [Required] - Output directory path (if the directory doesn't exist, create it)
output_dir : "outputs_bulldozer_pre_event"

#-------------------------#
#         Options         #
#-------------------------#
# [Optional] - If True, generates the DHM (DSM - DTM) in the output directory
generate_dhm : True
# [Optional] - If null, the output DTM resolution will be the same as the input DSM (float value in meter)
output_resolution : null
# [Optional] - If null, bulldozer will use the maximum number of available CPU on your system
nb_max_workers : 16
Bulldozer configuration
config_bulldozer_pre_event.yaml example in data_turkey directory:
#-------------------------#
# Bulldozer core settings #
#-------------------------#
# /!\ Modify those data at your own risk (it is suggested to keep the default values) /!\

# [Optional] - DetectDisturbedAreasAndFill part
slope_threshold : 2.0
# [Optional] - Number of evaluated axis. Vertical and horizontal if True else vertical, horizontal and diagonals.
four_connexity : True

# [Optional] - DtmExtraction parameters
uniform_filter_size : 3
prevent_unhook_iter : 10
num_outer_iter : 50
num_inner_iter : 10
mp_tile_size : 1500
Bulldozer DTM and DHM production
Steps:
# in virtualenv before !
cd data_turkey
# you need CARS generated DSM produced before.

# run pre event production
bulldozer --conf config_bulldozer_pre_event.yaml
# run post event production from post event scene 1 and post event scene 2
bulldozer --conf config_bulldozer_post_event.yaml
Bulldozer pre event DTM results
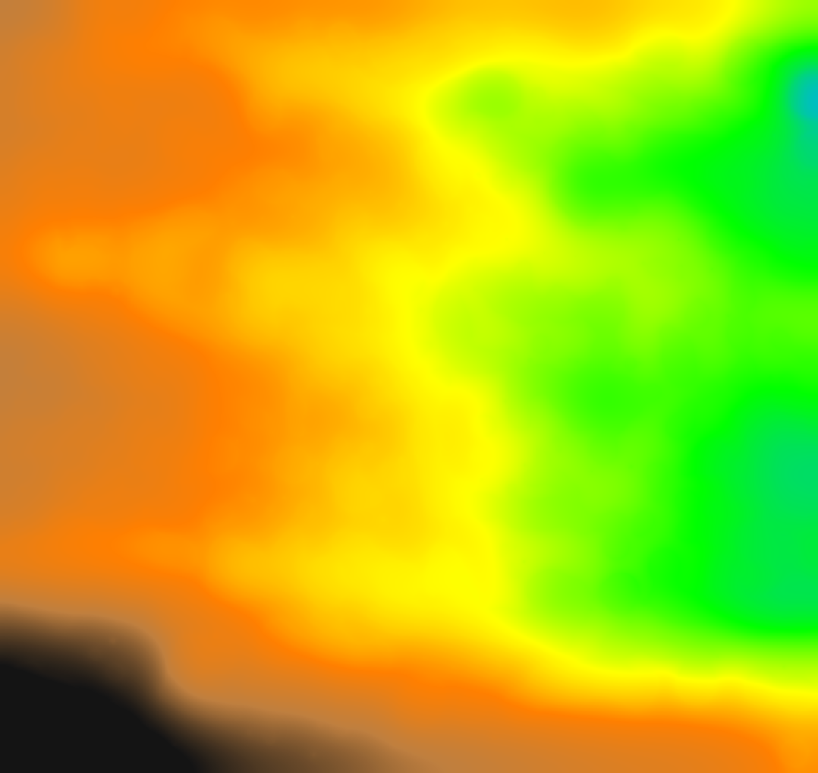
Bulldozer post event DTM results
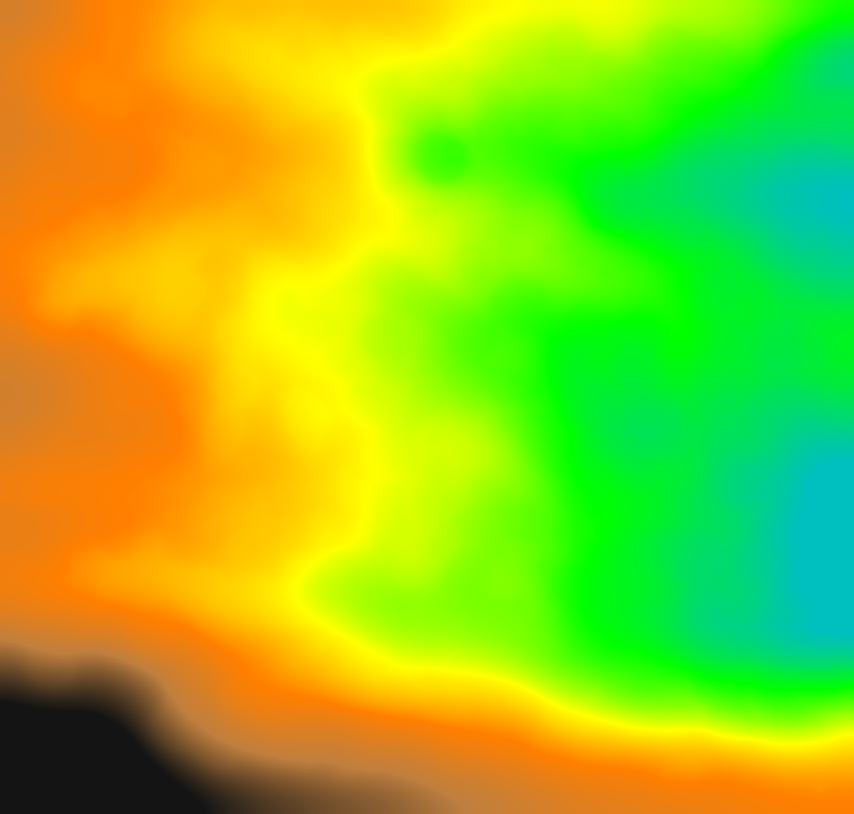
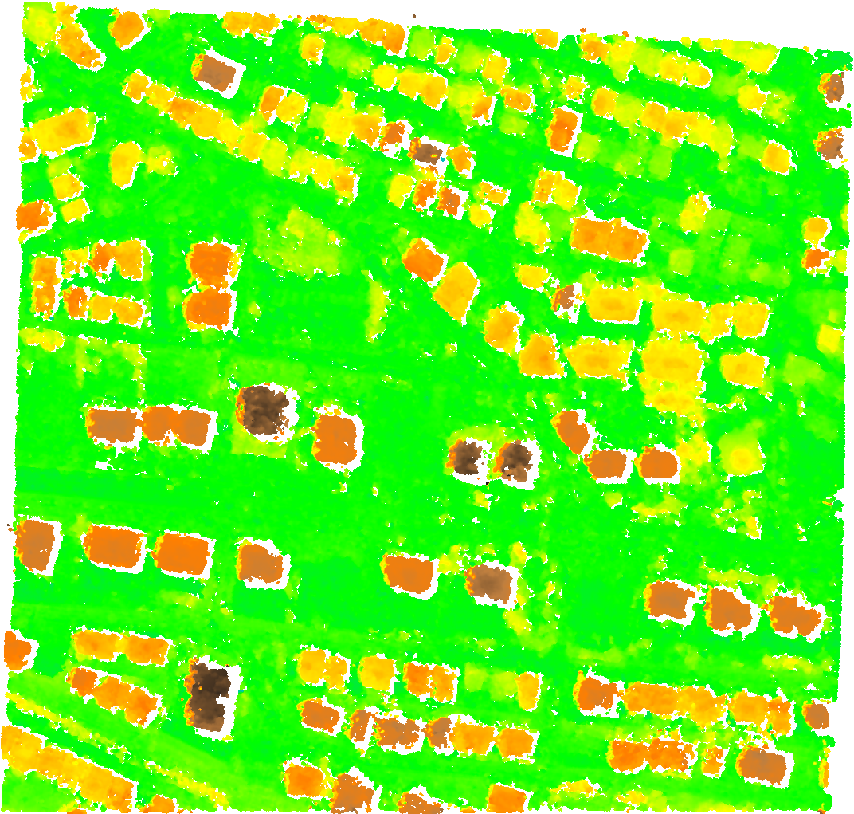
Bulldozer pre event DHM results
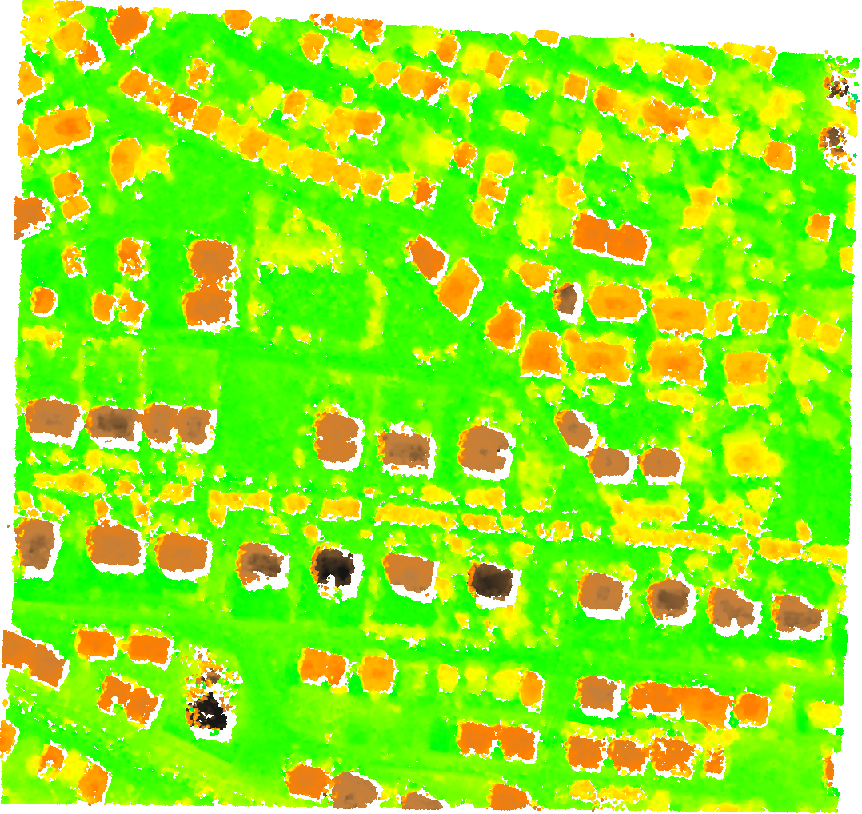
Bulldozer post event DHM results
DHM differences with Demcompare
- Demcompare tutorial (see dedicated slides)
- Demcompare configuration
- DSM and DHM differences production
- DSM and DHM differences results
DSM vs DHM differences
DSM differences is a raw difference between post event et pre event.
Using Digital Height Models allows to:
- normalize the height to zero (zero equal = terrain)
- remove possible vibrations of the satellite
Demcompare configuration
config_demcompare_diff_dhm.json example in data_turkey directory:
{
"output_dir": "./outputs_demcompare_diff_dhm/",
"input_ref" : {
"path": "outputs_bulldozer_post_event/DHM.tif",
"zunit" : "m"
},
"input_sec" : {
"path": "outputs_bulldozer_pre_event/DHM.tif",
"zunit" : "m",
"geoid_georef" : "True",
"nodata" : 0
},
"coregistration": {
"method_name": "nuth_kaab_internal",
"number_of_iterations": 6,
"estimated_initial_shift_x": 0,
"estimated_initial_shift_y": 0
},
"statistics": {
"classification_layers": {
"Slope0": {
"type": "slope",
"ranges": [
0,
5,
10,
25,
45
]
}
},
"remove_outliers": "True"
},
"report": "default"
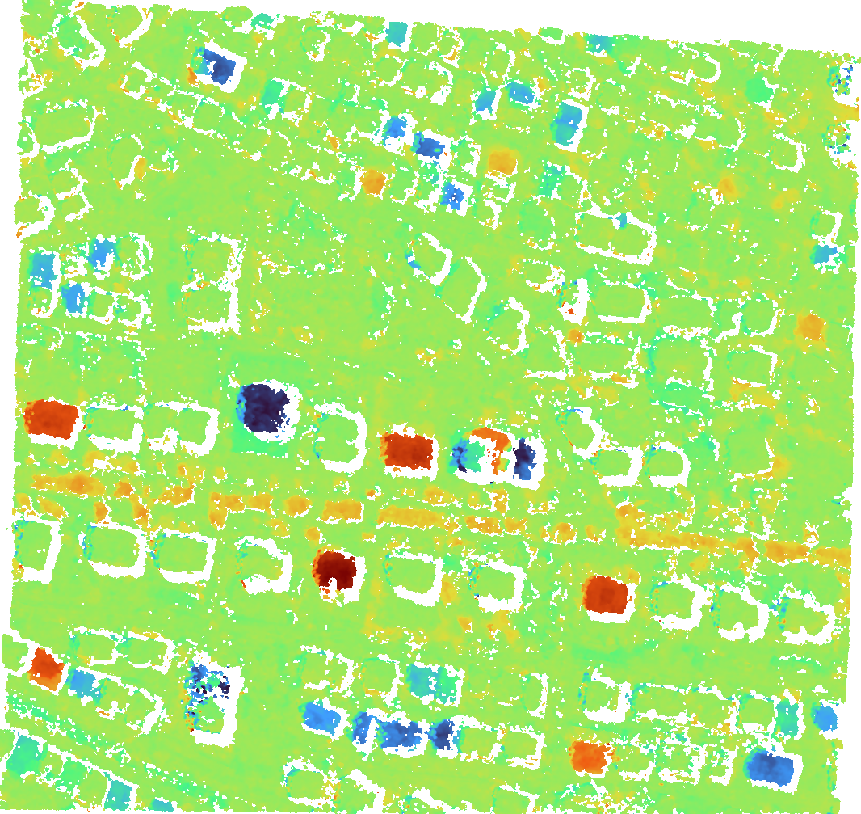
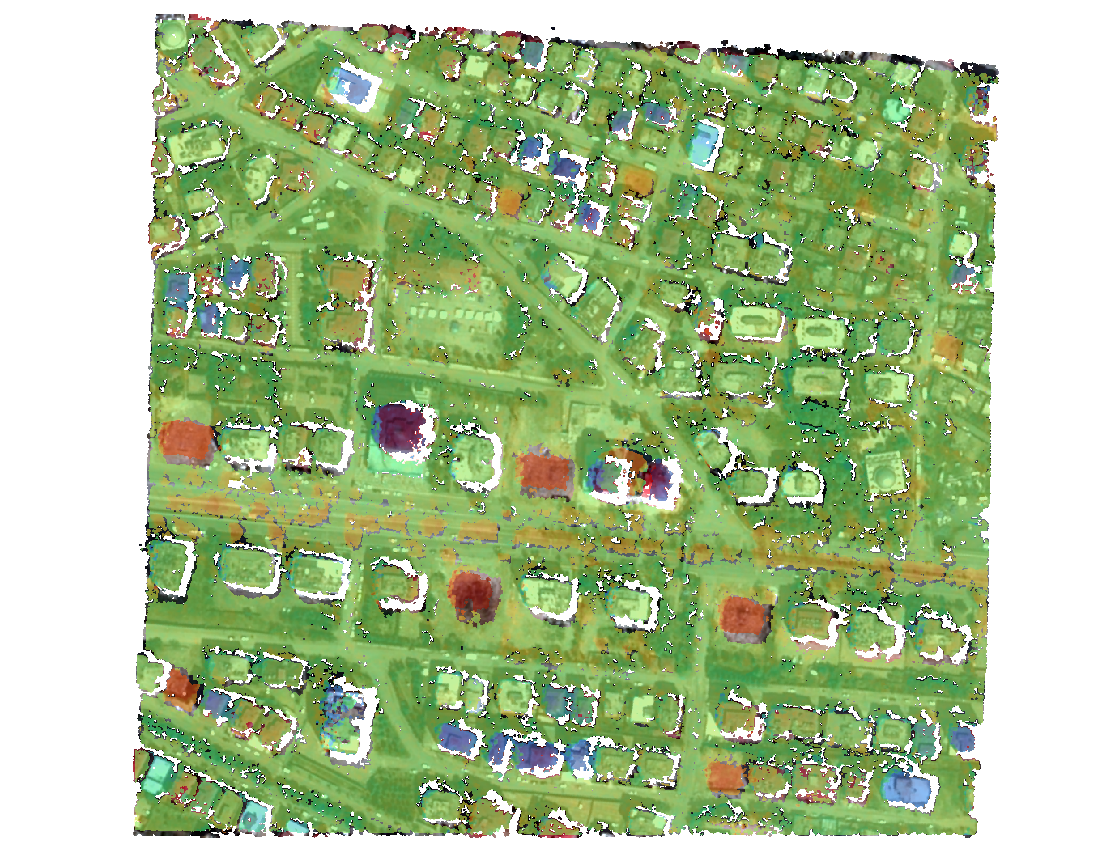
}DHM differences (POST-PRE) results
- Blue: new elements
- Red: collapsed or removed elements
DHM differences (POST-PRE) results
DHM differences (POST-PRE) results stacked with pre event DSM
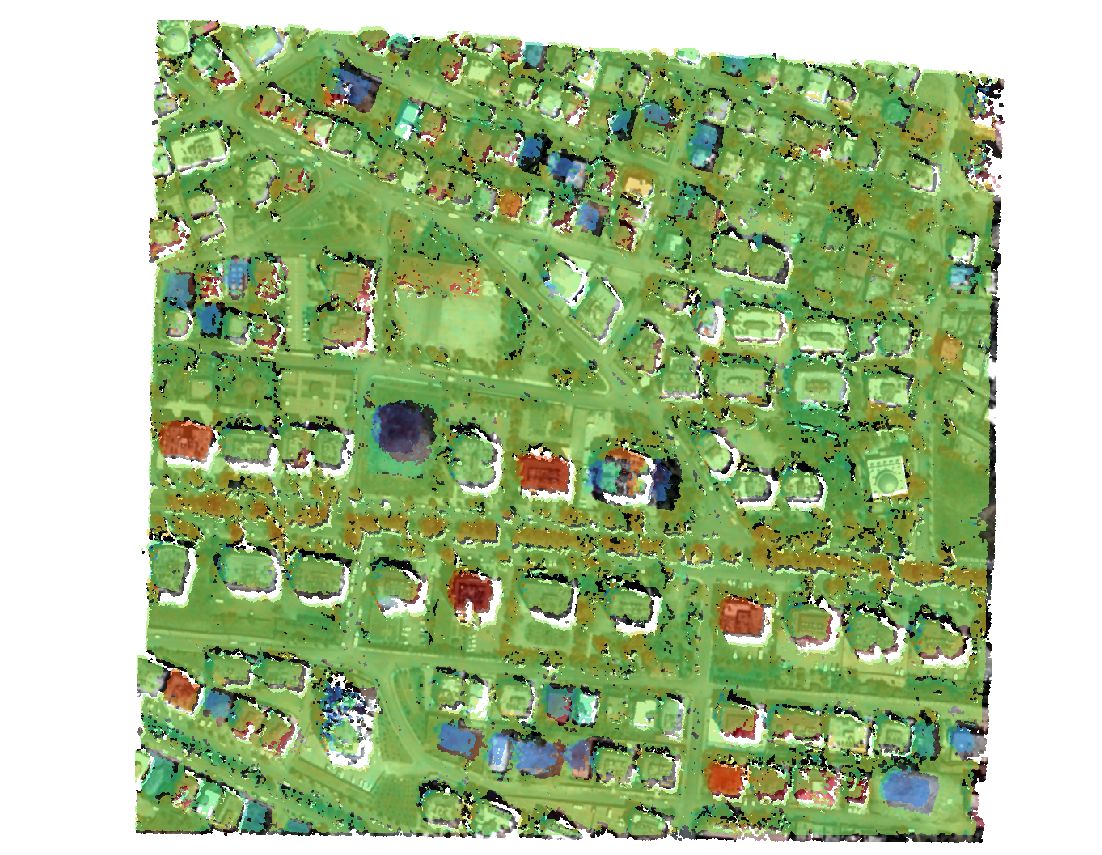
DHM differences (POST-PRE) stacked with post event DSM
Conclusion
This tutorial has shown a real scenario application using 3D maps difference before and after the event.
CNES 3D tools have been demonstrated to execute scenario steps.
Satellite can be a real added value:
- satellite revisit rate on a scene
- less expensive than a local LIDAR campaign
Perspectives:
Satellite 3D is beginning to be more and more accessible.
Tools:
- improving presented tools performance and stability
Applications:
- Automatic count number of buildings
- helping people that labelize the impacted areas
Questions ?
General 3D CNES tools contact: cars@cnes.fr
Specific contact:
- CARS: david.youssefi@cnes.fr
- Bulldozer: dimitri.lallement@cnes.fr
- Demcompare: emmanuel.dubois@cnes.fr